15 Ways to Preserve Wedding Bouquets So They Last a Lifetime
I’ve spent years digging into bridal trends, keepsake trends, and the quiet little details that make a wedding day linger long after the last dance — and if there’s one thing brides ask me about constantly, it’s how to preserve a wedding bouquet without watching it wilt into a sad, brown memory within a week. This guide pulls together every method I’ve researched, tested through reader feedback, and cross-checked with florists and preservation artists, so you’re getting the real, complete picture instead of a half-finished list.
So, how do you preserve a wedding bouquet? The best approach is picking a method suited to your flowers — air-drying, pressing, silica gel, resin casting, or professional freeze-drying — then displaying it in a frame, dome, or shadow box within a few days of your wedding for the best color and shape retention.
Stick around, though, because I’m not just naming methods. I’m giving you cost ranges, timelines, flower suitability, and side-by-side tables so you can actually decide what fits your bouquet, your budget, and your patience level.
Understanding the Different Types of Bouquet Preservation
Before you pick a method, it helps to know that “preserving a bouquet” isn’t one single process — it’s a whole family of techniques, each producing a different final look. Some methods keep flowers three-dimensional and full, like they’re frozen mid-bloom. Others flatten everything into delicate, paper-thin art. And some skip the flowers-as-flowers idea entirely, turning petals into jewelry, wax ornaments, or scented sachets. Your choice really depends on three things: the type of flowers in your bouquet, how much money you want to spend, and where you plan to display the finished keepsake. Let’s walk through all fifteen options so you can find the one that feels right.
1. Air-Drying — The Classic Hang-to-Dry Method
Air-drying is the oldest trick in the book, and honestly, it still works beautifully for sturdy blooms like roses, baby’s breath, lavender, and statice. You hang the bouquet upside down, stems tied with twine, in a dark, dry, well-ventilated spot for two to three weeks. This method suits budget-conscious brides and rustic, boho, or garden-style weddings especially well, since the slightly faded, muted colors that result actually enhance that aesthetic. Fabric ribbons holding the stems should be swapped for twine, since satin can slip as flowers shrink. Display the dried bouquet in a tall vase or lay it flat in a shadow box. It’s low-effort, low-cost, and gives off a warm, nostalgic vibe that fits almost any home decor style.
2. Pressing — Flat Preservation for Framing
Pressing works by flattening flowers between absorbent paper under steady weight, removing moisture while locking in shape and color. It’s ideal for thinner, flatter blooms — pansies, delphiniums, and small roses press far better than thick peonies or dahlias. This is a favorite for brides who want their bouquet turned into wall art for a nursery, hallway, or reading nook. Use a flower press or heavy books lined with parchment paper, and expect results in one to three weeks. Practical tip: separate petals before pressing thick flowers so they dry evenly instead of turning moldy in the center. The finished look is delicate, almost like botanical illustrations, and gives a soft, romantic, vintage feel to any preserved bouquet art piece.
3. Silica Gel Drying — Fast 3D Preservation
If you want your flowers to keep their full, rounded shape instead of flattening, silica gel is the way to go. The tiny beads absorb moisture from every petal surface within two to seven days, which is much faster than air-drying. This method handles delicate, full-bodied flowers like peonies, ranunculus, and orchids far better than hang-drying ever could. It’s a great pick for brides who want a shadow box display that still looks “full” rather than shrunken. Handle dried petals with tweezers since they become brittle. Store the finished bouquet away from humidity, ideally under glass. The payoff is a lifelike, dimensional keepsake that still reads as an actual bouquet, not just dried petals.
4. Freeze-Drying — Professional Full-Bloom Preservation

Freeze-drying is the gold standard when you want your bouquet to look almost exactly like it did on your wedding day — full color, full shape, full bloom. A professional preservation service places your flowers in a vacuum chamber that removes moisture at freezing temperatures over two to six weeks. This method costs more, typically $300 to $600 depending on bouquet size, but it’s worth it for brides with premium, sentimental blooms like garden roses or hydrangeas that they can’t imagine seeing shrink or fade. Ship your bouquet to the preservation studio within 24 to 48 hours of your wedding, unwrapped and slightly damp, for best results. The final bouquet is usually mounted in a glass dome or shadow box, creating a museum-quality keepsake with an elegant, timeless feel.
5. Resin Encasement — Paperweight and Keepsake Blocks

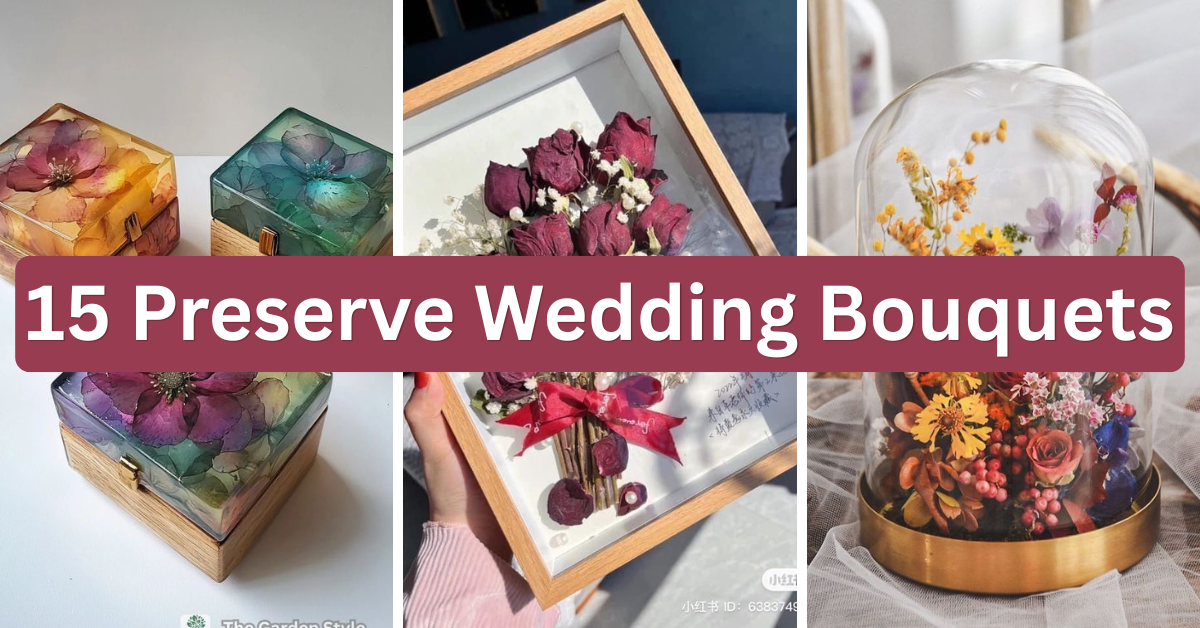
Resin preservation takes dried or pressed petals and suspends them inside a clear, hardened block — perfect for brides who want something tactile they can hold, not just hang on a wall. The process involves pouring liquid resin over arranged petals in layers, letting each layer cure before adding the next. This works well for small accent flowers rather than the entire bouquet, since large stems can trap air bubbles. It’s a favorite for engagement anniversary gifts or office desk keepsakes. Skill tip: work in a dust-free space and use a heat gun to pop bubbles before curing. The finished piece has a glassy, glossy finish that feels modern and sculptural rather than traditional.
6. Glycerin Soaking — Soft, Pliable Preservation

Unlike drying methods that leave flowers stiff and brittle, glycerin preservation keeps petals soft, flexible, and slightly glossy. Stems sit in a glycerin-water solution for one to three weeks, allowing the mixture to slowly replace the natural moisture inside the plant. This method suits foliage-heavy bouquets — eucalyptus, ferns, and ivy hold up especially well. It’s a great pick if you want to keep your bouquet somewhere it might get touched or moved often, like a coffee table centerpiece, since glycerin-treated flowers resist crumbling. The color often darkens slightly, giving an antique, amber-toned look that pairs beautifully with fall or vintage-themed weddings.
7. Shadow Box Display — 3D Keepsake Art

A shadow box turns your preserved bouquet (dried, silica-gel treated, or freeze-dried) into a piece of framed art with depth, rather than a flat picture. Flowers are arranged and glued inside a deep frame with a glass front, often alongside sentimental extras like the invitation, a lace swatch from the dress, or the garter. This works for literally any flower type since you control the arrangement yourself. Hang it in a bedroom or living room away from direct sunlight to prevent fading. Practical tip: use archival glue and acid-free backing board so the display lasts decades instead of yellowing within a few years. The result feels personal, layered, and genuinely artistic.
8. Glass Dome (Cloche) Display — Freeze-Dried Showcase

If your bouquet was freeze-dried and you want to actually see it as a whole bouquet rather than broken into pieces, a glass dome is the classic display choice. The bouquet sits on a small round base under a clear glass cloche, protecting it from dust and light damage while still keeping it fully visible. This suits ballroom and classic-style weddings especially well, since the elegant, museum-like presentation matches formal decor. Place it away from windows to slow fading, and consider a UV-protective glass dome for extra longevity. The look is polished, sophisticated, and instantly recognizable as a preserved wedding bouquet rather than generic dried flowers.
9. Pressed Flower Wall Art — Botanical Frame

Taking pressed petals a step further, you can arrange them into a designed botanical composition rather than a simple flat layout — think swirls, initials, or a wreath shape using bouquet flowers plus loose greenery. This works great for brides who want a piece that matches their existing home art rather than a purely sentimental object. Thin, flat flowers like larkspur and pansies arrange most easily into shapes. A practical tip: sketch your layout on paper first, then transfer flowers one at a time using tweezers and a toothpick dot of glue. The finished art feels intentional and gallery-worthy, elevating pressed flowers beyond a basic keepsake.
10. Petal Confetti and Potpourri — Everyday Sentimental Use
Not every bride wants a wall display — some prefer something they can actually use. Drying petals for potpourri or confetti keeps the sentimental value alive in a low-maintenance way. Spread petals on a mesh drying rack for about a week, then store them in a mason jar with a few drops of essential oil for scent. This works well with rose petals especially, since they hold fragrance longest. It’s a sweet option for brides who want to scatter a few petals into an anniversary card each year or refresh a bedroom sachet. The vibe here is casual, sentimental, and refreshingly low-pressure compared to framed displays.
11. Wax Dipping — Vintage-Style Preservation

Wax dipping coats individual dried flowers in a thin layer of melted wax, giving them a slightly translucent, aged-paper look reminiscent of old botanical specimens. Dip each dried stem briefly into melted paraffin wax, then hang to set. This suits smaller, sturdier blooms like baby’s breath or small roses rather than large, delicate flowers. It’s a niche but striking option for brides with a vintage, cottagecore, or antique wedding theme. Practical tip: work quickly and keep the wax at a low, steady temperature to avoid melting the flower’s fine details. The finished pieces look almost like preserved museum artifacts, adding a quiet, old-world elegance to a display shelf.
12. Resin Jewelry — Wearable Petal Keepsakes
For brides who want to carry their bouquet with them rather than just display it at home, resin jewelry turns tiny dried petals into pendants, rings, or earrings. A jeweler or DIY resin kit encases a few petals inside a small mold, creating a wearable keepsake you can bring to future anniversaries, vow renewals, or even your daughter’s wedding someday. This works best with small, flat petals rather than bulky blooms. It’s a meaningful gift idea for moms or bridesmaids too, since you can split the bouquet across multiple small jewelry pieces. The look is delicate, sentimental, and surprisingly modern for something made from wedding flowers.
13. Preserved Bouquet Ornament — Holiday Keepsake
If your wedding falls near the holidays, or you just love the idea of revisiting your bouquet every December, a preserved flower ornament is a sweet, low-cost option. Small dried or pressed petals get sealed inside a clear glass or acrylic ornament, sometimes with the wedding date etched on. This is an easy DIY project using a $5 craft ornament and a handful of dried petals. It’s a lovely addition to a first-anniversary “our first Christmas as newlyweds” tradition. The finished piece feels cozy, nostalgic, and easy to store safely in an ornament box the other eleven months of the year.
14. Custom Preserved Bouquet Art — Mixed Media Keepsake

This method combines preserved flowers with other wedding-day mementos — your invitation, ceremony program, a monogram, or even a handwritten vow excerpt — arranged together in one large frame. Many preservation studios offer this as a premium add-on to freeze-drying or pressing services, typically adding $50 to $150 to the base cost. It suits brides who want one single statement piece for their living room rather than several smaller keepsakes scattered around the house. Practical tip: request a layout mockup from your artist before final assembly so you can adjust spacing and balance. The result feels curated, meaningful, and genuinely gallery-worthy.
15. DIY Preservation Kit vs. Professional Service — Which to Choose

Not every bride has the patience — or the shipping budget — for a professional freeze-drying service, and that’s completely fine. DIY kits using silica gel or press-and-frame supplies cost as little as $20 to $60 and can be started the same day as your wedding. Professional services cost more but guarantee better color retention and a polished, gallery-ready finish. If your bouquet includes rare or sentimental blooms — say, flowers grown from a family garden — professional freeze-drying is worth the investment. If your budget is tighter or you enjoy hands-on crafting, DIY pressing or drying gets you 80% of the sentimental value for a fraction of the cost.
Preservation Methods Compared: Cost, Time, and Best Flower Types
| Method | Average Cost | Time to Complete | Best Flower Types | Final Look |
|---|---|---|---|---|
| Air-Drying | $0–$20 | 2–3 weeks | Roses, lavender, statice | Rustic, muted |
| Pressing | $10–$40 | 1–3 weeks | Pansies, delphinium | Flat, artistic |
| Silica Gel | $20–$50 | 2–7 days | Peonies, ranunculus | Full 3D shape |
| Freeze-Drying | $300–$600 | 2–6 weeks | Roses, hydrangeas, orchids | Lifelike, museum-quality |
| Resin Casting | $40–$150 | 1–2 days | Small petals, accents | Glossy, sculptural |
| Glycerin | $10–$30 | 1–3 weeks | Eucalyptus, ferns, ivy | Soft, amber-toned |
| Wax Dipping | $10–$25 | 1–2 days | Baby’s breath, small roses | Vintage, translucent |
DIY vs. Professional Preservation: A Quick Comparison
| Factor | DIY Kit | Professional Service |
|---|---|---|
| Skill Level Needed | Beginner-friendly | None (artist handles it) |
| Turnaround Time | Days to weeks | Weeks to months |
| Cost Range | $20–$60 | $150–$600+ |
| Best For | Budget brides, hands-on crafters | Premium blooms, gifting, heirloom pieces |
| Risk of Mistakes | Moderate | Low |
Drying vs. Pressing vs. Resin: Quick Definitions
Drying
: Removing moisture from whole flowers using air, silica gel, or freeze-drying so they keep some or all of their original 3D shape.
Pressing
: Flattening flowers under weight to remove moisture, resulting in a thin, paper-like final product suited for framing.
Resin Casting
: Suspending dried or fresh petals in liquid resin that hardens into a clear, solid keepsake like a paperweight or jewelry piece.
Quick Checklist Before You Start Preserving
- Remove floral foam, wire, and wet packaging immediately after the wedding
- Choose your method within 24–48 hours for best color retention
- Photograph the bouquet from multiple angles before starting, just in case
- Decide on display style (frame, dome, jewelry) before choosing a method
- Set a realistic budget range before contacting a professional preservation studio
Preserving a wedding bouquet is really about matching the right technique to your flowers, your patience, and your budget — and now you’ve got fifteen solid, tested paths to choose from instead of guessing. Whether you go with a simple air-dried bundle in a vase or splurge on professional freeze-drying under glass, the goal stays the same: keeping a little piece of your wedding day somewhere you’ll actually see it, long after the flowers would have naturally faded away.